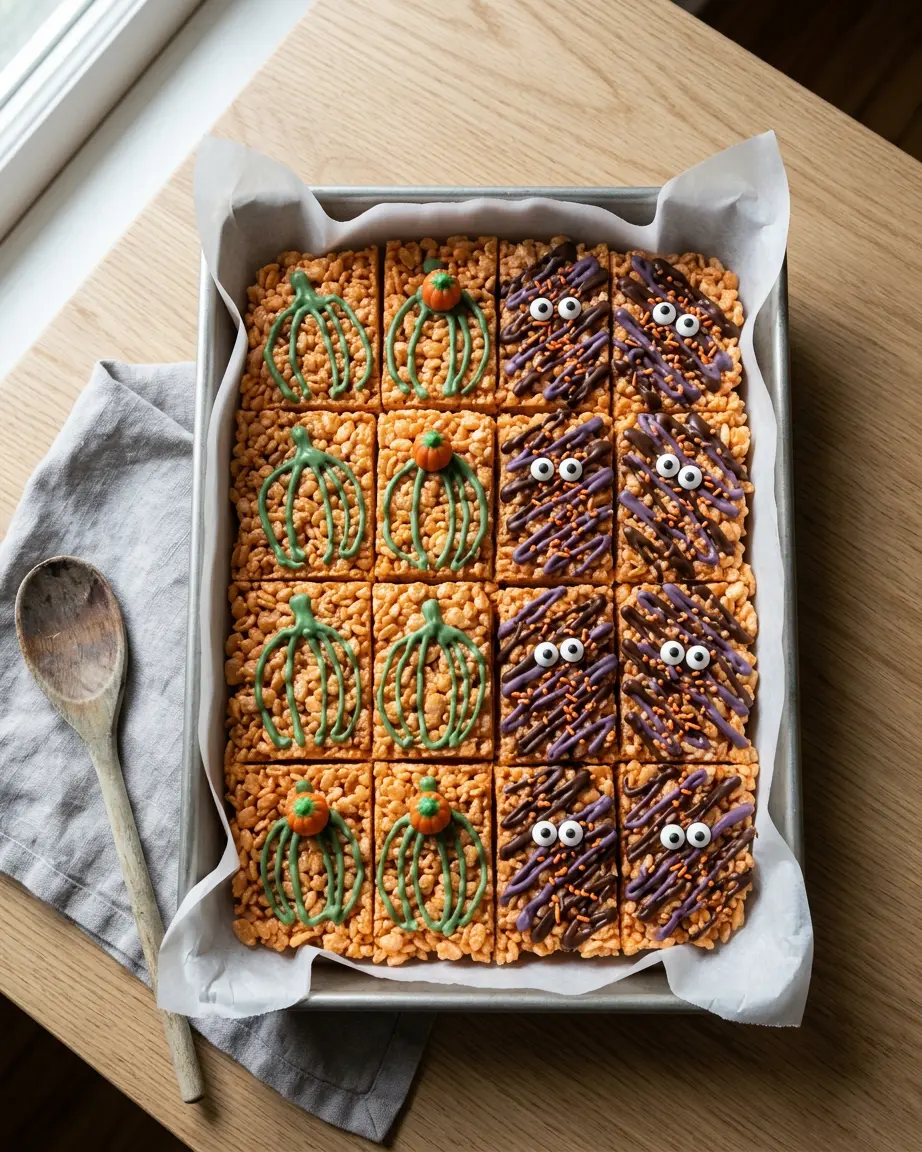
Halloween Rice Krispie Treats
These Halloween Rice Krispie treats come together in about 45 minutes, including cooling and setting with marshmallows, crispy rice cereal, and colorful decorations for chewy, festive pumpkin and monster-shaped sweets.
Prep
35 min
Cook
10 min
Total
45 min
Servings
12 treats
Ingredients
Tools that make this easier
Optional — the recipe works without them.
As an Amazon Associate, I earn from qualifying purchases.
- Most useful here 9×13 Baking Pan Shapes the orange marshmallow and crispy rice mixture into an even slab for cutting into 12 rectangles. Check price on Amazon
- Silicone Spoon Spatula Folds the crispy rice cereal into the melted marshmallows and helps press the mixture into the pan. Check price on Amazon
- Silicone Basting Brush Applies the melted green candy coating to make pumpkin stems on the treats. Check price on Amazon
Instructions
- 1
Line a 9×13-inch baking pan with parchment paper, leaving enough overhang to lift the treats out later (about 2 minutes). It's ready when the paper covers the bottom and extends over two opposite sides.
- 2
Place the butter and mini marshmallows in a large microwave-safe bowl. Microwave on high in 30-second intervals, stirring after each interval, for about 1 1/2 to 2 minutes total. It's ready when the marshmallows are mostly melted and the mixture is smooth after stirring.
- 3
Stir the vanilla extract, salt, and orange gel food coloring into the warm marshmallow mixture until evenly colored (about 1 minute). It's ready when the mixture has a consistent orange color without visible streaks.
- 4
Add the crispy rice cereal and fold gently with a heatproof spoon until every piece is coated. Transfer the mixture to the prepared pan and press it into an even layer with lightly buttered fingers or the back of the spoon, using gentle pressure (about 4 minutes). It's ready when the cereal is evenly coated and the layer holds together without being tightly compressed.
- 5
Let the treats cool in the pan at room temperature for 10 minutes, then lift them out using the parchment overhang and cut into 12 rectangles. It's ready when the slab holds its shape and can be cut without sticking excessively to the knife.
- 6
Place the green candy melts and semisweet chocolate chips in separate microwave-safe bowls. Microwave each on medium power in 20-second intervals, stirring between intervals, until melted and smooth; repeat with the purple candy melts if using (about 5 minutes). It's ready when each melted coating is smooth and flows easily from a spoon without scorching.
- 7
For pumpkin decorations, drizzle green candy coating over some treats to make stems and add pumpkin-shaped candies if desired. For monster treats, drizzle melted chocolate or purple candy coating over the remaining treats and immediately press two candy eyes onto each one. Finish with orange sprinkles if desired (about 3 minutes). It's ready when the decorations adhere to the treats and the monster eyes stay in place.
- 8
Allow the decorated treats to rest at room temperature for about 15 minutes, or until the candy coatings no longer smear when lightly touched. Allow additional setting time if needed before serving. It's ready when the coatings no longer smear when lightly touched.
Used in this recipe: 9×13 Baking Pan Silicone Spoon Spatula Silicone Basting Brush (Amazon, affiliate links)
Notes
Tips for Success
- Melt the marshmallows gently and press the cereal mixture into the pan lightly. High heat can make marshmallows tough, while firmly compacting the cereal creates dense treats instead of a soft, chewy texture.
- Microwave the marshmallows in short intervals and stop as soon as they can be stirred smooth. Fold the cereal in gently and press only enough to create an even layer. If the mixture starts stiffening before it reaches the pan, warm it briefly in the microwave for 10 seconds and stir.
Common Mistakes to Avoid
- The treats become hard and dense because the marshmallows are overheated or the cereal mixture is pressed too firmly into the pan.
Nutrition (per serving)
220 kcal
Calories
2g
Protein
38g
Carbs
7g
Fat
1g
Fiber
120mg
Sodium
Halloween Rice Krispie treats turn one orange-tinted cereal base into pumpkin and monster sweets with colorful candy decorations. Allow about 45 minutes including cooling and setting. These chewy, no-bake treats use melted marshmallows, crispy rice cereal, and simple toppings to create two Halloween designs without making separate batches.
Ingredients
- 4 tbsp unsalted butter, cut into pieces
- 10 oz mini marshmallows
- 1 tsp vanilla extract
- 1/8 tsp salt
- 6 cups crispy rice cereal
- 1/4 tsp orange gel food coloring, with more if needed for the desired shade
- 2 oz green candy melts, chopped
- 1/2 cup semisweet chocolate chips
- 2 oz purple candy melts, chopped (optional)
- 24 candy eyes
- 2 tbsp orange sprinkles (optional)
- 12 pumpkin-shaped candies (optional) Orange gel food coloring gives the marshmallow mixture its pumpkin-inspired color without adding much extra liquid. The green, chocolate, and purple coatings create contrasting decorations after the cereal slab cools.
How To Make It
The key to soft Halloween Rice Krispie treats is to melt the marshmallows gently and avoid packing the cereal mixture too tightly. The orange base can then be decorated as pumpkins or monsters, so there’s no need to prepare separate batches.
- Prepare the pan. Line a 9×13-inch baking pan with parchment paper, leaving enough overhang on opposite sides to lift out the treats. The paper should cover the bottom and extend beyond both sides.
- Melt the butter and marshmallows. Place the butter and mini marshmallows in a large microwave-safe bowl. Microwave on high in 30-second intervals, stirring after each interval, for about 1 1/2 to 2 minutes total. Stop when the marshmallows are mostly melted and the mixture becomes smooth with stirring.
- Color the marshmallow mixture. Stir in the vanilla extract, salt, and orange gel food coloring while the mixture is warm. Mix until the color is even, with no visible streaks or pale patches.
- Fold in the cereal. Add the crispy rice cereal and gently fold until every piece is coated. Transfer the mixture to the prepared pan and press it into an even layer with lightly buttered fingers or the back of a spoon. Use only enough pressure to help the treats hold together; packing them firmly can make the finished squares hard.
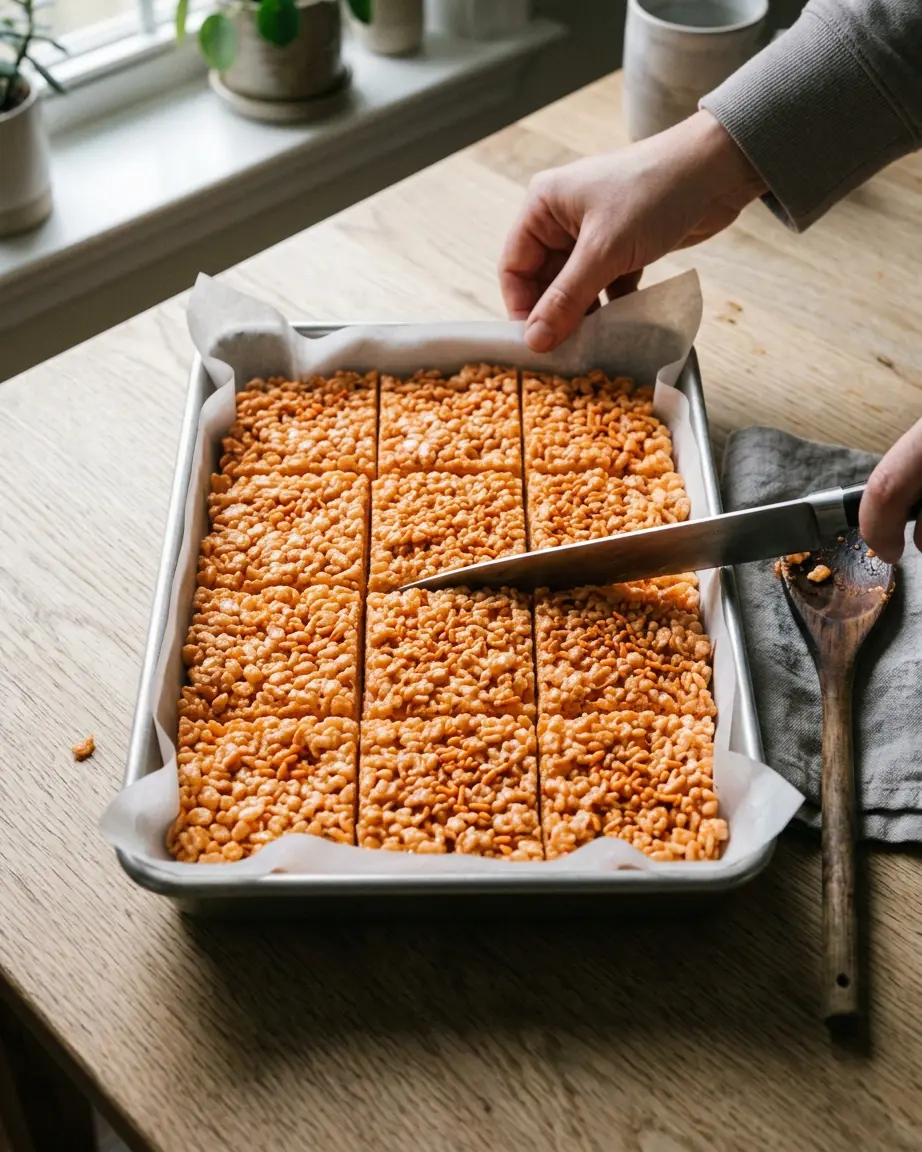
- Cool and cut. Let the treats cool in the pan at room temperature for 10 minutes. Lift out the slab using the parchment overhang and cut it into 12 rectangles. The slab should hold its shape, and the knife should cut through without excessive sticking.
- Melt the decorations. Place the green candy melts and semisweet chocolate chips in separate microwave-safe bowls. Microwave each on medium power in 20-second intervals, stirring between intervals, until melted and smooth. Repeat with the purple candy melts if using. Each coating should flow easily from a spoon without scorching.
- Decorate the pumpkins and monsters. For pumpkin designs, drizzle green candy coating over some treats to create stems and add pumpkin-shaped candies if desired. For monster designs, drizzle melted chocolate or purple candy coating over the remaining treats, then immediately press two candy eyes onto each one. Finish with orange sprinkles if desired.
- Let the coatings set. Leave the decorated treats at room temperature until the candy coatings no longer smear when lightly touched. This helps keep the designs distinct when the treats are arranged on a platter.
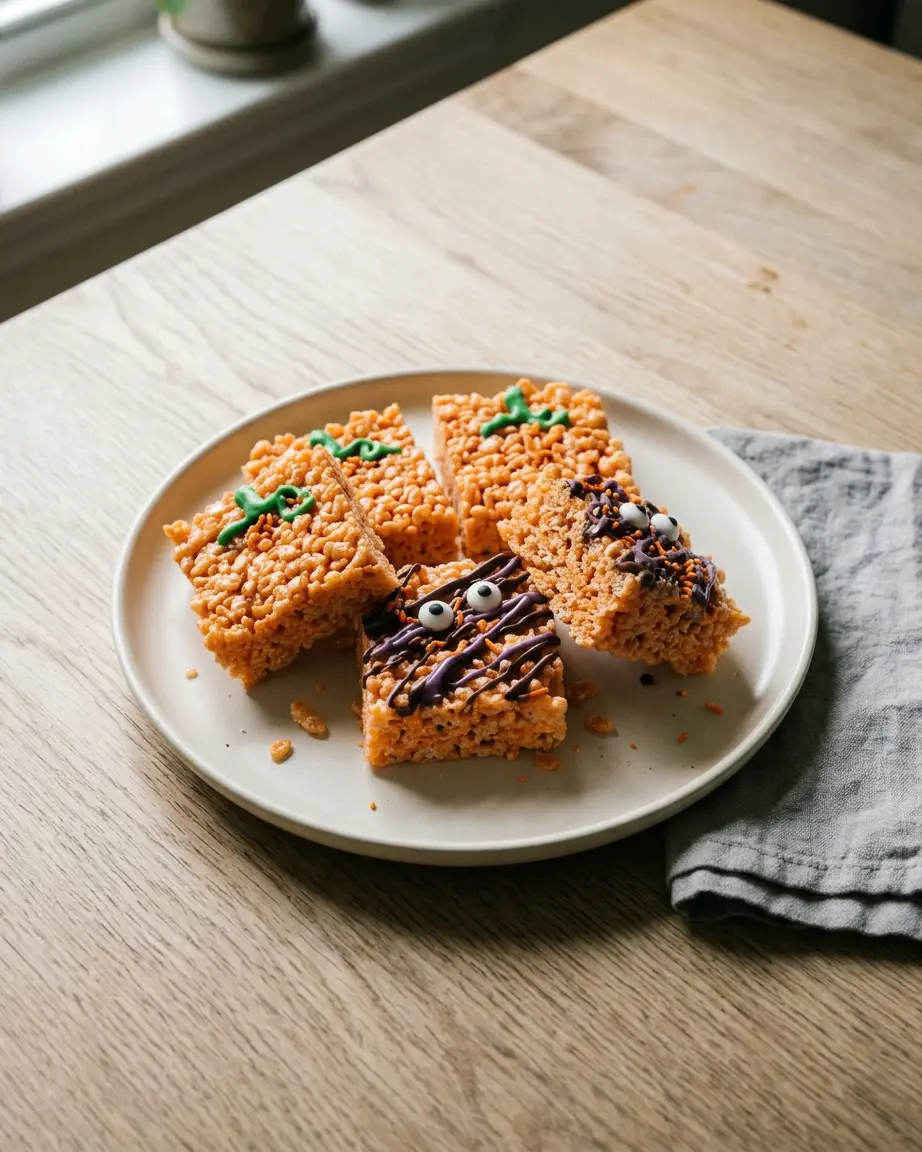
Why One Orange Base Works for Both Designs
The orange cereal mixture gives every treat a consistent Halloween color, while the toppings make each design different. Green coating creates pumpkin stems, and chocolate or purple coating provides a darker background for monster faces. Adding the decorations after the cereal slab has cooled also makes the process easier to manage. The treats are firm enough to cut into neat rectangles before the melted coatings and candy eyes are added, so the finished designs stay more defined.
How to Keep Rice Krispie Treats Soft and Chewy
The biggest risk is overheating the marshmallows or compressing the cereal mixture too firmly. Both can make the treats dense and hard instead of soft and chewy. Microwave the marshmallows in short intervals and stop as soon as stirring makes the mixture smooth. Fold in the cereal gently, then press it into the pan only enough to create an even layer. If the mixture starts stiffening before it reaches the pan, warm it briefly in the microwave for 10 seconds and stir. This can loosen the mixture enough to spread without needing to press it down harder.
Substitutions
These are untested alternatives, so expect some differences in flavor, color, or texture.
- Salted butter: Use it instead of unsalted butter, but omit the added salt. The treats will taste slightly saltier.
- Regular marshmallows: Use about 40 regular marshmallows by weight equivalent and cut them into smaller pieces to help them melt more evenly.
- Orange candy melts: These can replace the orange gel food coloring, but the cereal mixture may not become uniformly orange unless the coating is incorporated into the marshmallow mixture. The finished treats may also be sweeter and firmer.
- Milk chocolate chips: Use these instead of semisweet chocolate chips for the monster decorations. Expect a sweeter coating with a milder chocolate flavor.
Make-Ahead Tips
Prepare the cereal slab up to 1 day ahead, let it cool completely, and store it uncut in an airtight container at room temperature. Cut and decorate the treats on the day of serving for clearer designs and neater candy details. Keep in mind that storage time starts when the cereal slab is prepared, not when the decorations are added.
How to Store Halloween Rice Krispie Treats
Store these cereal treats in an airtight container at room temperature for up to 2 days from preparation. Separate layers with parchment. This advice is for the listed marshmallow, cereal and candy ingredients, without perishable toppings. They are served at room temperature rather than reheated. For the basic cereal mixture, follow the manufacturer’s storage guidance.
Serving Ideas
Arrange the pumpkin and monster designs together on a Halloween party snack board for a mix of colors and shapes. These treats also pair well with:
- Hot apple cider for a cozy autumn snack.
- Halloween chocolate-dipped pretzels for a sweet-and-salty party spread.
- Fresh apple slices for a crisp contrast to the chewy cereal treats.