Graduation Cookies
Celebrate a big milestone with decorated graduation cookies using a simple sugar cookie base and royal icing. Perfect for parties, gifts, or dessert trays.
Prep
1 hr 10 min
Cook
10 min
Total
1 hr 20 min
Servings
24 cookies
Ingredients
Shop this recipe
As an Amazon Associate, I earn from qualifying purchases.
Instructions
- 1
Prepare the cookie dough. Whisk together the flour, baking powder, and salt in a medium bowl. In a separate bowl, beat the butter and sugar until the mixture looks pale and fluffy. Add the egg, vanilla, and almond extract, then mix until smooth. Gradually add the dry ingredients until a soft dough forms.
- 2
Chill the dough. Divide the dough into two discs and wrap them tightly. Refrigerate for at least 1 hour. The dough should feel firm enough to roll without sticking excessively.
- 3
Roll and cut the cookies. Preheat the oven to 350°F (175°C). Roll the chilled dough to about 1/4-inch thickness on a lightly floured surface. Cut into graduation cap shapes, circles, rectangles for diploma cookies, or classic shapes using cookie cutters.
- 4
Bake until set. Place the cookies on parchment-lined baking sheets and bake for 8–10 minutes. The edges should look lightly set while the centers remain pale. Avoid deep browning to keep the surface smooth for decorating.
- 5
Cool completely. Let the cookies rest on the baking sheet for 5 minutes before transferring them to a wire rack. The cookies should feel firm and completely cool before icing.
- 6
Make the royal icing. Beat the confectioners' sugar, meringue powder, water, and vanilla until smooth and glossy. Adjust with a few drops of water if needed. Many home bakers use a royal icing consistency guide like the one from Sally's Baking Addiction when preparing icing for outlining and flooding cookies.
- 7
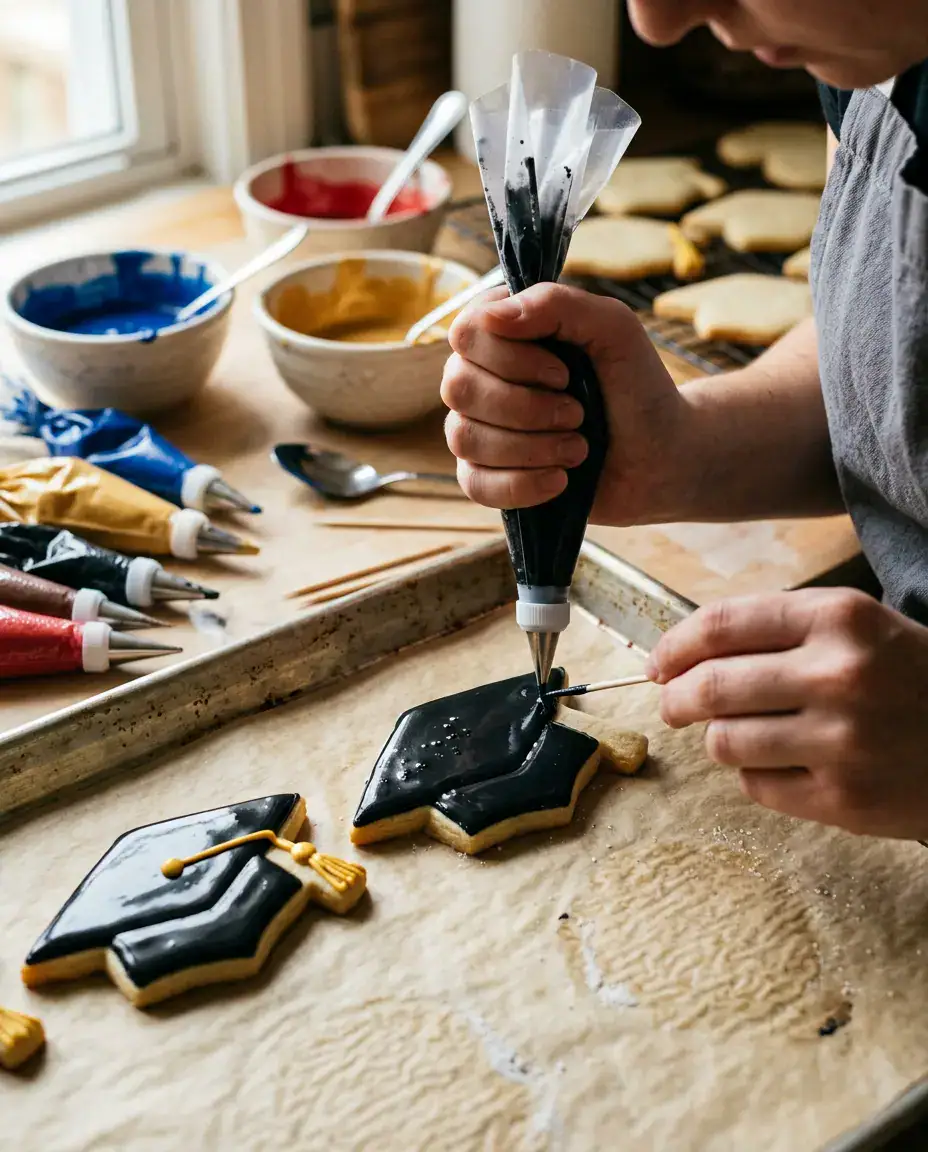
Outline the designs. Transfer thicker icing to piping bags and outline each cookie. For graduation cap cookies, pipe the mortarboard shape first. For diploma cookies, outline a rolled-scroll design.
- 8
Flood the cookies. Thin a portion of the icing slightly and fill the outlined areas. Use a toothpick to spread icing into corners and remove air bubbles. The surface should settle into a smooth, glossy finish within a minute or two.
- 9
Add details. Once the base layer begins to set, pipe tassels, borders, school colors, names, or graduation years. Let the decorated grad cookies dry for several hours until the icing feels hard to the touch.
Notes
Tips for Success
- Easy to customize
- Perfect for graduation parties
Nutrition (per serving)
290 kcal
Calories
2g
Protein
53g
Carbs
8g
Fat
0g
Fiber
60mg
Sodium
Graduation cookies are a fun way to celebrate a big milestone, whether you’re hosting a party, filling dessert trays, or packaging treats as gifts. These decorated grad cookies use a simple sugar cookie base and royal icing to create graduation cap cookies, diploma cookies, and personalized designs that look impressive without requiring professional decorating skills.
Ingredients
For the Sugar Cookies
- 3 cups all-purpose flour
- 1 teaspoon baking powder
- 1/2 teaspoon salt
- 1 cup unsalted butter, softened
- 1 cup granulated sugar
- 1 large egg
- 2 teaspoons vanilla extract
- 1/2 teaspoon almond extract (optional)
For the Royal Icing
- 4 cups confectioners’ sugar, sifted
- 3 tablespoons meringue powder
- 8–10 tablespoons water
- 1 teaspoon vanilla extract
- Gel food coloring in your school colors
For Decorating
- Black gel food coloring for graduation cap cookies
- Gold or yellow icing for tassels
- Small food-safe markers for writing names or graduation years
- Edible glitter or sprinkles (optional)
How To Make It
Prepare the cookie dough. Whisk together the flour, baking powder, and salt in a medium bowl. In a separate bowl, beat the butter and sugar until the mixture looks pale and fluffy. Add the egg, vanilla, and almond extract, then mix until smooth. Gradually add the dry ingredients until a soft dough forms.
Chill the dough. Divide the dough into two discs and wrap them tightly. Refrigerate for at least 1 hour. The dough should feel firm enough to roll without sticking excessively.
Roll and cut the cookies. Preheat the oven to 350°F (175°C). Roll the chilled dough to about 1/4-inch thickness on a lightly floured surface. Cut into graduation cap shapes, circles, rectangles for diploma cookies, or classic shapes using cookie cutters.
Bake until set. Place the cookies on parchment-lined baking sheets and bake for 8–10 minutes. The edges should look lightly set while the centers remain pale. Avoid deep browning to keep the surface smooth for decorating.
Cool completely. Let the cookies rest on the baking sheet for 5 minutes before transferring them to a wire rack. The cookies should feel firm and completely cool before icing.
Make the royal icing. Beat the confectioners’ sugar, meringue powder, water, and vanilla until smooth and glossy. Adjust with a few drops of water if needed. Many home bakers use a royal icing consistency guide like the one from Sally’s Baking Addiction when preparing icing for outlining and flooding cookies.
Outline the designs. Transfer thicker icing to piping bags and outline each cookie. For graduation cap cookies, pipe the mortarboard shape first. For diploma cookies, outline a rolled-scroll design.
Flood the cookies. Thin a portion of the icing slightly and fill the outlined areas. Use a toothpick to spread icing into corners and remove air bubbles. The surface should settle into a smooth, glossy finish within a minute or two.
Add details. Once the base layer begins to set, pipe tassels, borders, school colors, names, or graduation years. Let the decorated grad cookies dry for several hours until the icing feels hard to the touch.
Why This Works
Graduation cookies succeed because the sugar cookie base holds crisp edges during baking, making decorative shapes easier to recognize. The royal icing creates a smooth canvas that can be customized for any school color, graduation year, or theme.
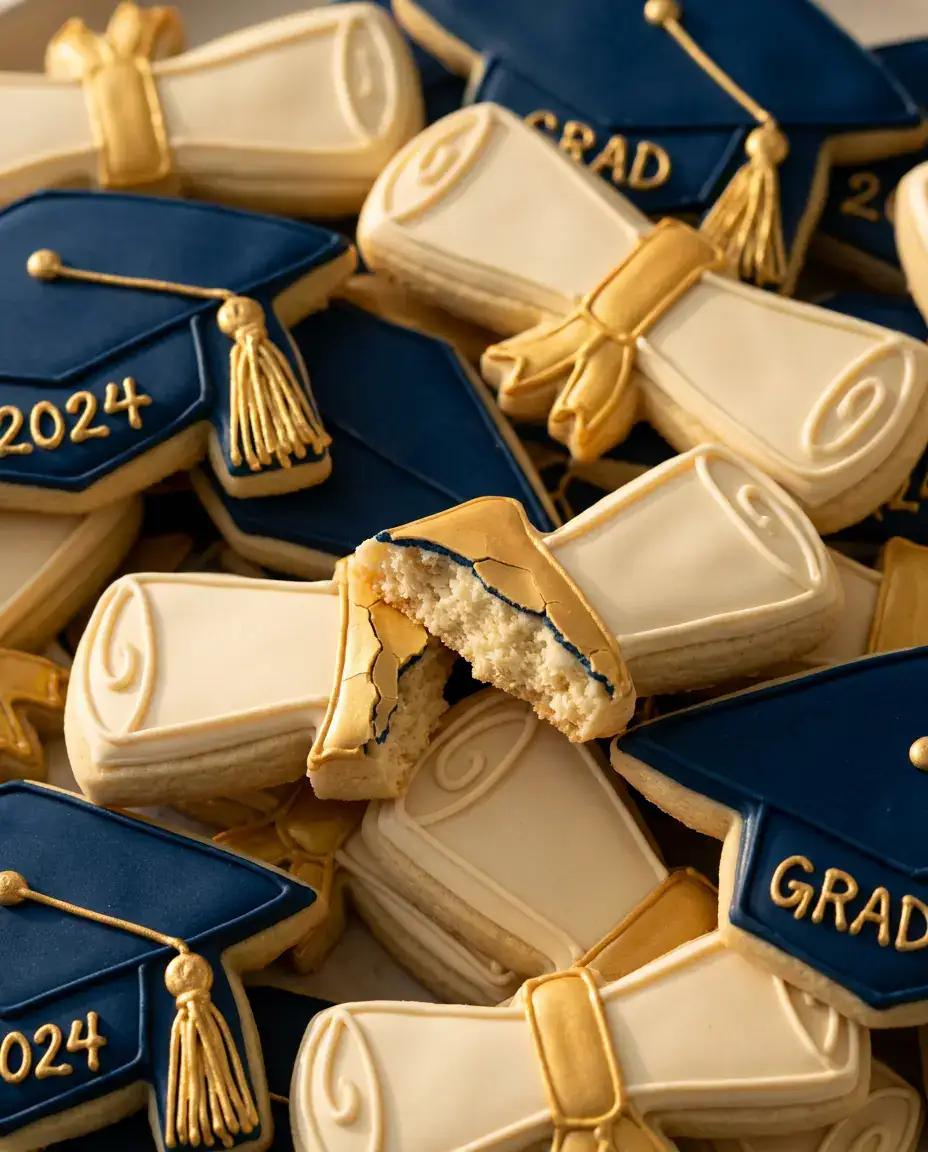
Another advantage is flexibility. You can make graduation cap cookies for a formal look, diploma cookies for a classic graduation theme, or mix several designs on one dessert table. The same dough and icing work across all of them.
Tips for Easy Graduation Cookies
- Chill the dough thoroughly before cutting shapes. Warm dough tends to spread and can blur detailed graduation designs.
- If your icing develops peaks that do not settle after a few seconds, add water one drop at a time until it smooths out.
- Many home cooks find that decorating cookies in stages prevents colors from bleeding together. Allow one layer to dry before adding details.
- For inspiration on graduation-themed decorating, you can see examples of celebration cookies featured by The Pioneer Woman.
- If the cookies develop small surface cracks after icing, the icing may have been too thick. A slightly thinner flood consistency often creates a smoother finish.
Serving Ideas
Graduation cookies work well as both dessert and party decor. Arrange graduation cap cookies around the cake table, stack diploma cookies in clear gift bags, or display assorted sugar grad cookies on tiered stands in school colors.
For larger celebrations, create a cookie assortment with different designs and personalize a few cookies with the graduate’s name, year, or future college. Guests often enjoy choosing from a variety of decorated styles rather than a single design.
FAQ
Can I make graduation cookies ahead of time?
Yes. The baked cookies can be prepared several days in advance and stored in an airtight container. Decorated cookies are often easiest to manage when made one to three days before the event, giving the icing plenty of time to dry completely.
Can I freeze decorated grad cookies?
Yes. Once the icing has fully hardened, place the cookies in airtight containers with parchment paper between layers. Freeze for up to two months and thaw in the container to reduce condensation on the icing.
What if I don’t have meringue powder?
You can use an alternative royal icing recipe, but meringue powder helps create a stable icing that dries firm and smooth. For detailed graduation cap cookies and diploma cookies, it generally provides the most reliable results.
Why are my cookies spreading during baking?
The dough may not have been chilled long enough, or the butter may have been too soft when mixed. Chilling the cut cookies for 10–15 minutes before baking can help preserve sharp edges.
How do I write names and graduation years neatly?
Allow the icing to dry completely before adding lettering. Food-safe edible markers work well for names, years, and small details because they offer more control than piping thin icing.