Graduation Cookies
Celebrate a big milestone with decorated graduation cookies using a simple sugar cookie base and royal icing. Perfect for parties, gifts, or dessert trays.
Prep
1 hr 10 min
Cook
10 min
Total
1 hr 20 min
Servings
24 cookies
Ingredients
Tools that make this easier
Optional — the recipe works without them.
As an Amazon Associate, I earn from qualifying purchases.
- Most useful here Wooden Rolling Pin Rolls the chilled dough to 1/4-inch for the graduation cap cutouts. Check price on Amazon
- Piping Bag and Tip Set Pipes the royal icing outlines, tassels and borders on the cookies. Check price on Amazon
- Wire Cooling Rack Cools the cookies completely before they get icing. Check price on Amazon
Instructions
- 1
Prepare the cookie dough. Whisk together the flour, baking powder, and salt in a medium bowl. In a separate bowl, beat the butter and sugar until the mixture looks pale and fluffy. Add the egg, vanilla, and almond extract, then mix until smooth. Gradually add the dry ingredients until a soft dough forms.
- 2
Chill the dough. Divide the dough into two discs and wrap them tightly. Refrigerate for at least 1 hour. The dough should feel firm enough to roll without sticking excessively.
- 3
Roll and cut the cookies. Preheat the oven to 350°F (175°C). Roll the chilled dough to about 1/4-inch thickness on a lightly floured surface. Cut into graduation cap shapes, circles, rectangles for diploma cookies, or classic shapes using cookie cutters.
- 4
Bake until set. Place the cookies on parchment-lined baking sheets and bake for 8–10 minutes. The edges should look lightly set while the centers remain pale. Avoid deep browning to keep the surface smooth for decorating.
- 5
Cool completely. Let the cookies rest on the baking sheet for 5 minutes before transferring them to a wire rack. The cookies should feel firm and completely cool before icing.
- 6
Make the royal icing. Beat the confectioners' sugar, meringue powder, water, and vanilla until smooth and glossy. Adjust with a few drops of water if needed. Use a thicker consistency for outlining and a slightly thinner one for flooding.
- 7
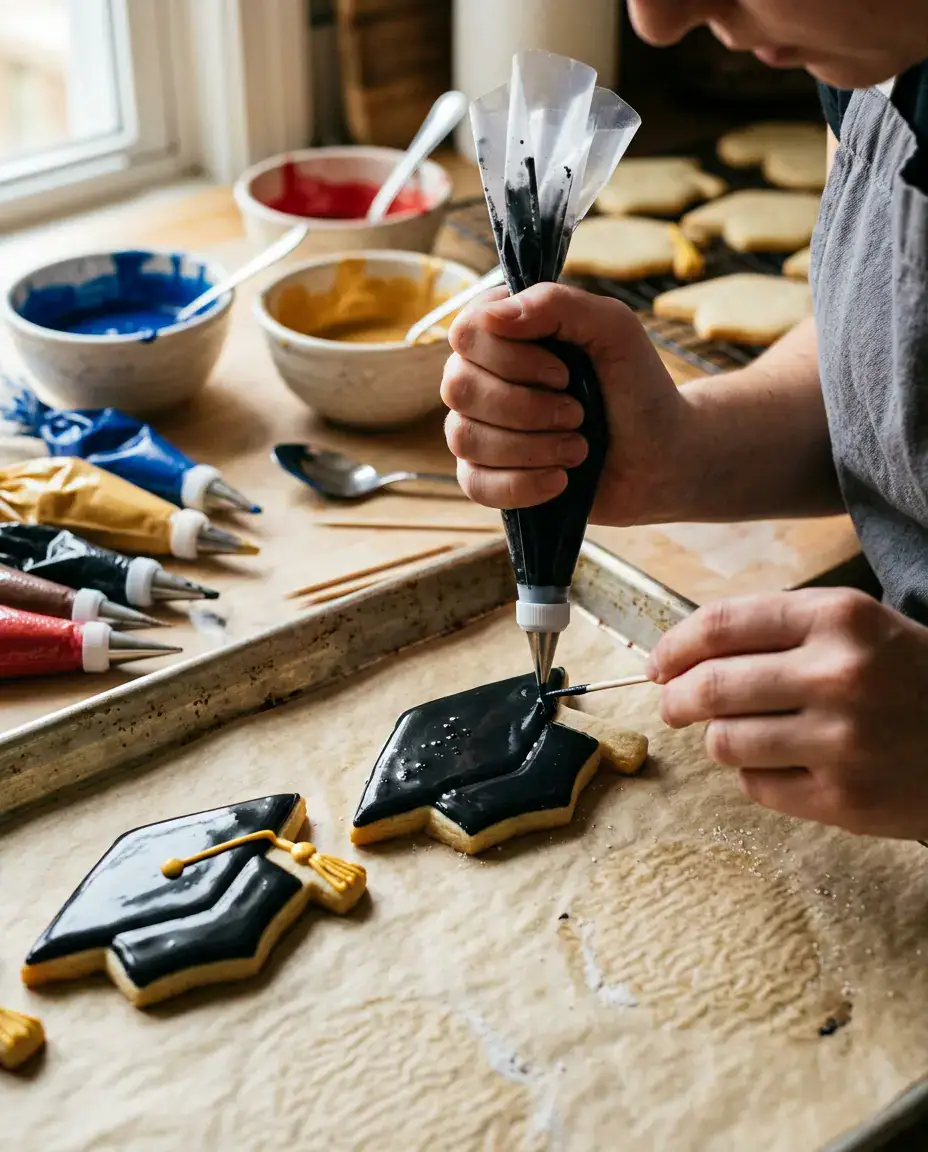
Outline the designs. Transfer thicker icing to piping bags and outline each cookie. For graduation cap cookies, pipe the mortarboard shape first. For diploma cookies, outline a rolled-scroll design.
- 8
Flood the cookies. Thin a portion of the icing slightly and fill the outlined areas. Use a toothpick to spread icing into corners and remove air bubbles. The surface should settle into a smooth, glossy finish within a minute or two.
- 9
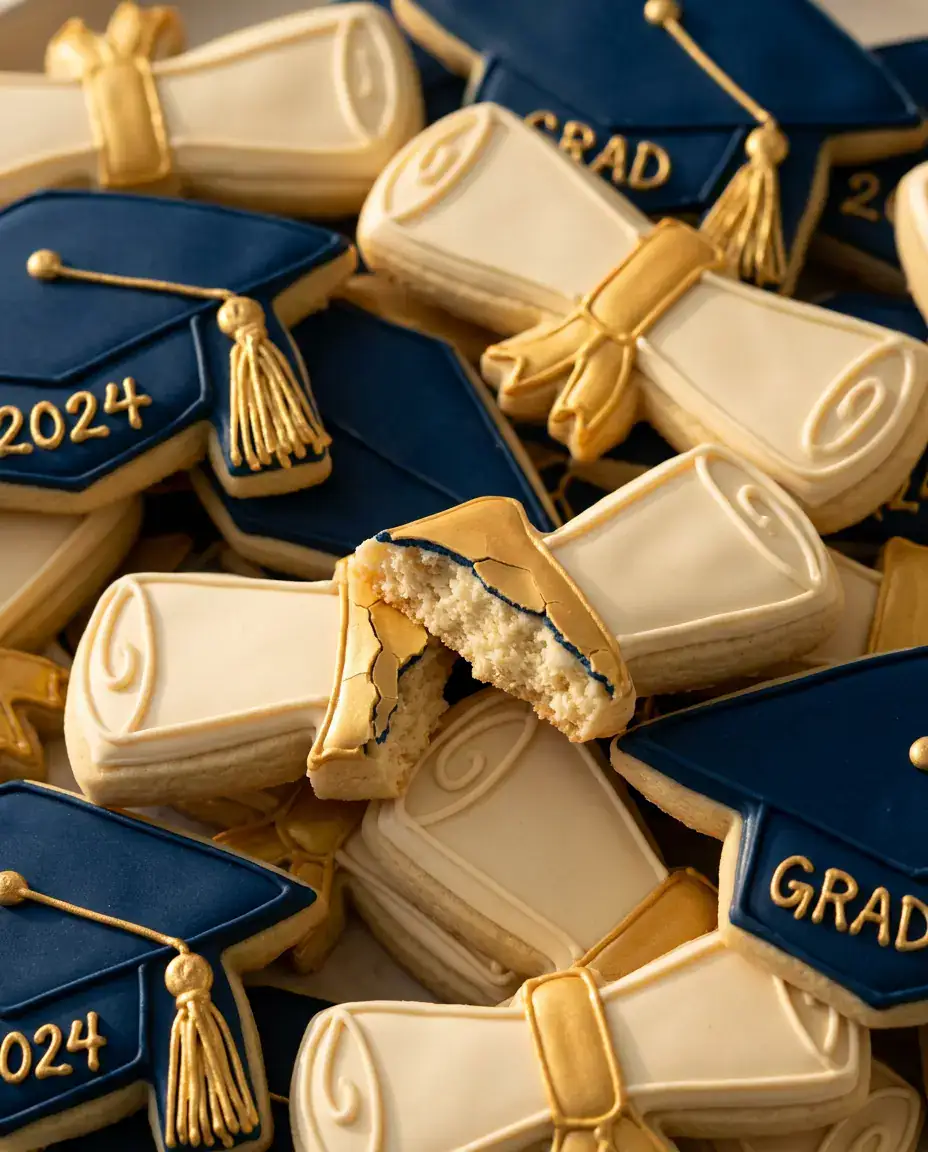
Add details. Once the base layer begins to set, pipe tassels, borders, school colors, names, or graduation years. Let the decorated grad cookies dry for several hours until the icing feels hard to the touch.
Used in this recipe: Wooden Rolling Pin Piping Bag and Tip Set Wire Cooling Rack (Amazon, affiliate links)
Notes
Tips for Success
- Easy to customize
- Perfect for graduation parties
Nutrition (per serving)
290 kcal
Calories
2g
Protein
53g
Carbs
8g
Fat
0g
Fiber
60mg
Sodium
These graduation cookies use a sturdy, roll-out sugar cookie dough and meringue-powder royal icing, so they keep crisp edges while baking and give you a smooth surface to decorate. You can cut graduation caps, diplomas or plain circles, flood them in school colors and add names or the year with food-safe markers. The recipe makes 24 cookies and works well for party tables, dessert trays and gift bags.
Ingredients
For the sugar cookies
- 3 cups all-purpose flour
- 1 teaspoon baking powder
- 1/2 teaspoon salt
- 1 cup unsalted butter, softened
- 1 cup granulated sugar
- 1 large egg
- 2 teaspoons vanilla extract
- 1/2 teaspoon almond extract (optional)
For the royal icing
- 4 cups confectioners’ sugar, sifted
- 3 tablespoons meringue powder
- 8-10 tablespoons water
- 1 teaspoon vanilla extract
- Gel food coloring in your school colors
For decorating
- Black gel food coloring for graduation caps
- Gold or yellow icing for tassels
- Small food-safe markers for names or graduation years
- Edible glitter or sprinkles (optional)
Time Plan: Dough Chilling and Icing Drying
The card lists about 1 hour 20 minutes of active prep, baking and decorating, including the 1-hour dough chill. The bake itself is only 8 to 10 minutes per tray. Keep in mind that decorated cookies then need several hours for the icing to harden, so make them at least a day before the event.
How to Bake and Decorate Graduation Cookies
- Make the dough. Whisk the flour, baking powder and salt in a medium bowl. In another bowl, beat the butter and sugar until pale and fluffy, then mix in the egg, vanilla and almond extract. Gradually add the dry ingredients until a soft dough forms.
- Chill. Divide the dough into two discs, wrap tightly and refrigerate for at least 1 hour, until firm enough to roll without sticking.
- Roll and cut. Preheat the oven to 350°F (175°C). Roll the dough to about 1/4 inch thick on a lightly floured surface and cut caps, circles, rectangles for diplomas or other shapes.
- Bake. Place on parchment-lined sheets and bake 8 to 10 minutes, until the edges look set and the centers are pale. Avoid browning, which would make the surface uneven for icing.
- Cool completely. Rest on the sheet for 5 minutes, then move to a wire rack until fully cool.
- Make the icing. Beat the confectioners’ sugar, meringue powder, water and vanilla until smooth and glossy, adding a few drops of water if needed. Keep some of the icing thick for outlining and thin the rest for flooding.
- Outline. Pipe thicker icing around the edge of each cookie. Start with the mortarboard shape for caps and a rolled-scroll outline for diplomas.
- Flood. Thin part of the icing slightly and fill the outlines. Use a toothpick to push it into corners and pop air bubbles. It should settle to a smooth, glossy surface within a minute or two.
- Add details. When the base layer begins to set, pipe tassels, borders, names or the year. Let the cookies dry several hours until the icing is hard to the touch.
Decorating Tips: Sharp Shapes, Smooth Icing, No Bleeding
- Chill thoroughly. Warm dough spreads and blurs fine shapes. Chilling the cut cookies for 10 to 15 minutes before baking helps them keep sharp edges.
- Icing peaks that will not settle: Add water one drop at a time until they smooth out.
- Surface cracks after icing: The icing was too thick. A slightly thinner flood gives a smoother finish.
- Colors bleeding: Decorate in stages and let each layer dry before adding details.
- Neat lettering: Let the icing dry completely, then write with food-safe edible markers, which give more control than thin piped lines.
- No meringue powder: Another royal icing recipe will work, but meringue powder makes an icing that dries firm and smooth, which matters for caps and diplomas.
Setting Up a Graduation Dessert Table
Arrange caps around the cake, stack diplomas in clear gift bags or display an assortment on tiered stands in school colors. Personalize a few with the graduate’s name, year or college. Pair them with our graduation cupcakes and graduation cake ideas for a full dessert table. For other decorated cookies using the same dough-and-icing approach, see our July 4th sugar cookies and Father’s Day decorated cookies.
Make Ahead, Storage and Freezing
- Baked, undecorated cookies: Prepare several days ahead and keep in an airtight container.
- Decorated cookies: Make them 1 to 3 days before the event so the icing has time to dry completely.
- Freezer: Once the icing has fully hardened, freeze in airtight containers with parchment between layers for up to 2 months. Thaw in the closed container so condensation forms on the container rather than the icing.
FAQ
Why are my cookies spreading during baking?
The dough was not chilled long enough or the butter was too soft. Chill the dough fully and the cut shapes briefly before baking.
Can I make graduation cookies ahead of time?
Yes. Bake them several days ahead and decorate 1 to 3 days before the party.
Can I freeze decorated cookies?
Yes, once the icing is fully hard. Layer with parchment in airtight containers and freeze up to 2 months.